🧰 Tools & Gear You’ll Need
- Lip Liner(s) in shades matching or slightly darker than your natural lip color
- Lipstick or Lip Tint (optional, for added color and longevity)
- Concealer (a shade lighter than your skin tone)
- Small, dense brush or sponge for concealer
- Highlighter (pencil, cream, or powder)
- Lip Brush (optional, for precise application)
- Clear or subtly tinted lip gloss
- Lip exfoliator (sugar scrub or gentle brush)
- Hydrating lip balm
The Ultimate Guide to Naturally Fuller Lips: Lining & Contouring Techniques
Forget the needles and the high cost of fillers. Achieving a naturally fuller pout is entirely within reach using strategic makeup techniques. This guide, forged in the demanding world of stage and screen where illusion is everything, will walk you through every step. We’re cutting through the fluff to give you the hard-won, practical knowledge to sculpt and enhance your lips for a plump, yet undeniably natural, effect. Think of this as your backstage pass to fuller-looking lips, no invasive procedures required.
Understanding Your Lip Shape: The Foundation for Perfect Contour
Before you even pick up a liner, you need to know the landscape you’re working with. Every lip is unique, and understanding its natural shape is paramount to creating a convincing illusion of volume. Are your lips naturally thin all over? Is your top lip significantly less full than your bottom? Do you have a defined Cupid’s bow, or is it more rounded? Knowing these details prevents you from trying to force an unnatural shape and allows you to work *with* your anatomy, not against it.
For instance, if your top lip is naturally thinner, focusing your plumping efforts subtly on the center and the peaks of your Cupid’s bow will yield better results than trying to overline the entire lip uniformly. If your lips are thinner overall, a consistent, slight overline around the entire perimeter is the way to go. This isn’t about dramatic reshaping; it’s about intelligent enhancement. The goal is to make people wonder if you just naturally have great lips, not if you’ve had work done.

Choosing the Right Lip Liner: Texture, Color, and Application Tips
The lip liner is your primary sculpting tool. It’s not just about color; texture and shade are critical. For natural plumping, avoid overly waxy, draggy liners that create harsh, visible lines. Opt for creamy, blendable formulas that glide on smoothly. These allow for easier manipulation and a softer finish.
Color matching is where many go wrong. The golden rule for a natural look? Match your liner as closely as possible to your natural lip color, or the shade of your lipstick if you’re using one. A liner that’s too dark or too light will immediately betray the illusion. Keep a few shades in your arsenal: one that’s your exact lip tone, one slightly deeper, and one that matches your go-to nude lipstick. This versatility is key.
Application is crucial. Start in the center of your lips and work outwards. Use light, feathery strokes. Think of it as sketching, not painting a solid block. The aim is to define and subtly shape, not to create a stark outline. If you’re using a lipstick, you can even use the liner as a base, filling in the entire lip for longer wear, but always ensure the edges are soft before applying lipstick.
💡 Pro Tip:
For an instant plumping effect *before* liner, gently blot your lips with a tissue after applying a light layer of foundation or concealer. This removes natural oils and creates a smoother canvas, allowing the liner to grip better and the color to appear more saturated, thus enhancing the illusion of fullness.
Mastering the Liner: Creating the Illusion of Volume
This is where the magic happens. The core principle is to slightly extend the natural lip line in key areas to trick the eye into perceiving more volume. We’re talking millimeters, not miles. The most effective areas to focus on are the center of the bottom lip and the peaks of the Cupid’s bow on the top lip.
For the Top Lip: Follow your natural Cupid’s bow, but extend the line *just* slightly over the edge on the upward curve of each peak. Do not connect this extended line all the way to the corners in a straight, overt manner. Instead, aim for a subtle, gentle curve that rounds the peak. Blend this extended line inward immediately with a finger or a brush.
For the Bottom Lip: Concentrate on the center. Draw a slightly curved line that follows your natural lip line, but pushes outwards by the tiniest margin. Again, the key is subtlety. Avoid extending the line all the way to the corners, as this can create an unnatural, downturned effect. Keep the extension focused on the fullest part of your pout.
The Corners: For a truly natural look, it’s generally best to line *within* or directly *on* your natural lip line at the corners. Overlining the corners can pull the mouth down or create an artificial, overly wide appearance. The goal is fullness, not width.
Assess & Prep
Examine your lip shape in good lighting. Apply a hydrating balm, let it absorb, then blot. This preps the canvas.
Strategize Your Lines
Choose a liner that matches your natural lip tone or lipstick. Identify the fullest points of your bottom lip and the peaks of your Cupid’s bow.
Execute the Subtle Overline
Using light, controlled strokes, extend the line *just* beyond your natural edge on the center of the bottom lip and the Cupid’s bow peaks. Keep corners precisely on or inside the natural line.
Blend Immediately
Using your finger, a brush, or the liner’s smudge tip, softly blend the overdrawn line inward, blurring the edge into your natural lip. This is critical for the illusion.
Contour Secrets: Sculpting for a Plump, Natural Look
Liner is the blueprint, but contouring adds depth and dimension, truly selling the illusion of fullness. This involves strategic use of lighter and darker tones, much like facial contouring, but on a much more delicate scale.
The Subtle Art of Overlining: Where and How to Add Volume
We’ve touched on this, but it bears repeating with emphasis. The “where” is critical. Overline *only* where you want to create the illusion of more volume. This means focusing on the fleshy parts, primarily the center of the bottom lip and the very apex of the Cupid’s bow. Think of it as highlighting the most prominent features of your lips.
The “how” involves using a liner that is *exactly* your lip shade or the shade of your lipstick. If you’re going for a nude look, a liner that’s a touch darker than your skin tone can work, but it must be blended seamlessly. The technique is to draw a line that sits *just* outside your natural lip boundary in these key areas. A common mistake is overlining the entire lip evenly. This flattens the dimension and often looks unnatural. Instead, create a subtle “pull” outwards in specific spots.
Consider the thickness of your natural lip. If your bottom lip is naturally much fuller, focus more on enhancing the top lip’s Cupid’s bow. If both are thin, a consistent, minute overline around the entire mouth is your best bet, but still prioritize the center of the bottom lip for that key plumping effect.

Using Concealer and Highlighter: Defining Your Cupid’s Bow and Edges
Concealer and highlighter are your secret weapons for sharpness and lift. After lining and blending, take a small amount of concealer on a fine brush or your fingertip. Pat it *very carefully* around the outer edges of your lips, just outside the liner. This creates a clean, defined border and subtly lifts the lip area, making the lined portion appear more prominent.
The real trick here is the Cupid’s bow. Apply a tiny dab of a matte or satin highlighter (avoiding anything too glittery for a natural look) directly onto the peaks of your Cupid’s bow. Blend gently outwards. This catches the light, creating a focal point and giving the impression of a more pronounced, pouty shape. You can also apply a touch of concealer sharpened along the *outer* edge of your bottom lip line to make it appear more projected forward.
Expert Pitfall: Using too much concealer or highlighter, or applying it too close to the lip line itself, can make your lips look artificially painted or create stark, unnatural highlights. Less is more. The goal is a subtle, light-catching effect, not a neon sign.
💡 Pro Tip:
Instead of a traditional concealer, consider a lip-perfecting pencil. These are formulated to be blendable and often have a slightly matte finish, offering a cleaner edge than liquid concealer without looking cakey. Use it to clean up any wobbly lines or to sharpen the edge just outside your liner.
Blending is Key: Achieving a Seamless, Natural Finish
This cannot be stressed enough. Harsh lines are the enemy of a natural plumping effect. Once your liner is applied and any concealer/highlighter is in place, you *must* blend. Use a clean finger, a fluffy brush, or even the lip brush you might use for lipstick application. Gently buff the edges of your lip liner inwards, softening any distinct lines. The goal is a gradient effect, where the slightly overlined areas seamlessly meld into your natural lip color.
If you’ve overlined, the transition from the overlined area to the natural lip needs to be undetectable. Use circular motions to diffuse the color. If you’re applying lipstick or gloss over the liner, ensure the blending happens *before* these layers are applied, or incorporate them into the blending process. The final look should not have any visible demarcation lines.
Think of it like shading on a drawing. You’re adding dimension by softening transitions. A stark line says “makeup,” while a soft blend says “naturally full lips.”
Beyond Liner & Contour: Complementary Techniques for Fuller Lips
While liner and contour are the heavy lifters, a few other techniques can significantly boost the plumping illusion and overall appearance of your lips.
Lip Gloss and Balms: Enhancing Shine and Definition
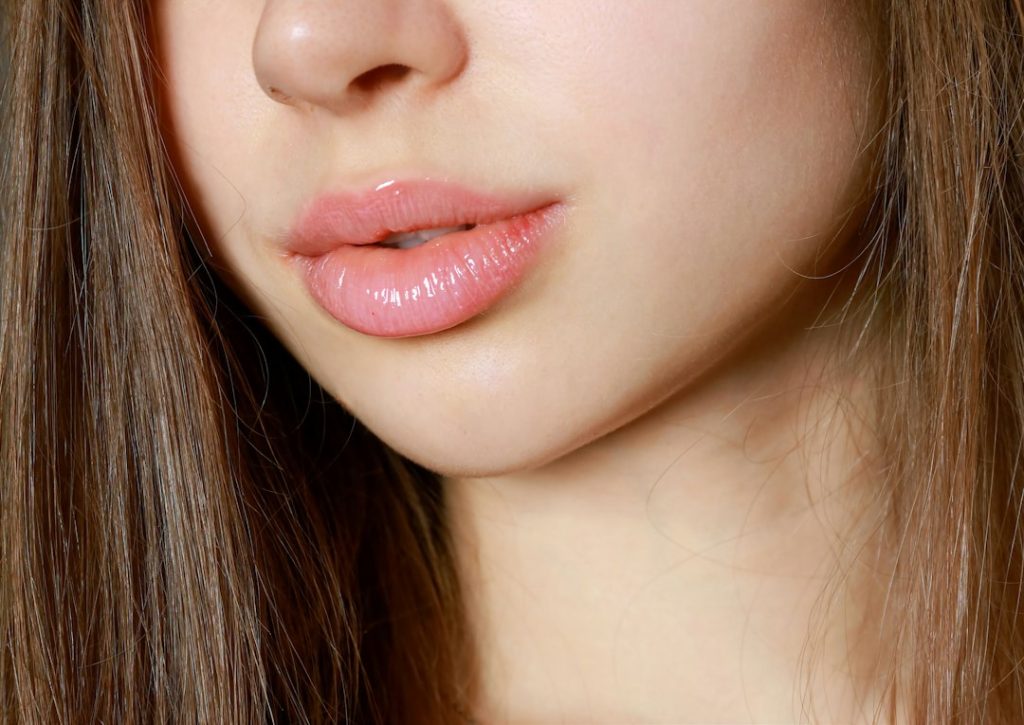
A touch of gloss is your best friend for creating the illusion of fullness. Shine reflects light, and light makes things appear larger and more prominent. After your liner and/or lipstick, apply a clear or subtly tinted gloss, focusing the application on the center of your bottom lip and the Cupid’s bow. This draws attention to these key areas and adds a dewy, plump look.
Hydrating balms also play a role. While not directly for plumping, well-moisturized lips appear smoother and fuller. A balm applied *before* makeup, or a clear, non-sticky gloss applied as a final step, can enhance the plumpness achieved through other methods. Avoid overly sticky glosses, as they can look dated and feel uncomfortable.

Color Theory for Plumpness: Strategic Shade Selection
Color plays a surprisingly significant role in perceived volume. Generally, lighter and brighter colors tend to make lips look fuller, while darker, matte shades can make them appear smaller.
Nudes and Pinks: Shades that are close to your natural lip color, or slightly lighter, are excellent for a natural plumping effect. Think soft peaches, rosy nudes, and muted pinks. These enhance your natural lip tone without adding harsh contrast.
The Power of Ombre: A subtle ombre effect can also create depth. Use a slightly darker liner around the outer edges (but still within your natural line or just slightly outside) and a lighter lipstick or gloss in the center. This draws the eye inward, making the center appear fuller.
Matte vs. Shine: As mentioned, matte finishes absorb light and can recede, making lips look smaller. Incorporating a touch of gloss or choosing satin finishes over ultra-matte will always enhance the appearance of fullness.
💡 Pro Tip:
The “lipstick as liner” trick: If you don’t have the perfect liner shade, use a lipstick with a fine-tipped applicator or a lip brush to line your lips. It offers more flexibility and a softer edge, especially when using a creamy formula. Ensure you blot the lipstick first for a matte base before trying to create defined lines.
Exfoliation and Hydration: Prepping Lips for Optimal Results
This is the foundational work that makes all the techniques above shine. Dry, flaky lips will never look plump, no matter how skillfully you apply makeup. Incorporate regular lip exfoliation and hydration into your routine.
Exfoliation: Once or twice a week, use a gentle sugar scrub or a soft toothbrush to buff away dead skin cells. This smooths the lip surface, allowing products to glide on evenly and making the lips appear naturally smoother and fuller. Be gentle; harsh scrubbing can cause irritation and redness.
Hydration: Apply a rich, nourishing lip balm frequently throughout the day, especially before bed. Ingredients like shea butter, hyaluronic acid, and natural oils work wonders. Well-hydrated lips are naturally plumper and smoother, providing the perfect canvas for makeup application and enhancing the final plumped look.
Common Mistakes to Avoid When Lining and Contouring Lips for Volume
Even with the best intentions, certain pitfalls can sabotage your efforts. Knowing these common errors is as crucial as knowing the techniques themselves.
The Overlined Pitfall: Avoiding the “Clown Mouth” Effect
This is the most frequent and glaring mistake. Overlining too much, too far out, or all the way around the lip creates an unnatural, distorted shape. It looks artificial and can even make your lips appear smaller because the proportions are thrown off. Remember: millimeters, not inches. Focus on the natural curves and fleshy parts, and always blend meticulously.
Liner-Only Illusion: Why You Need More Than Just a Line
Many assume that simply drawing a line outside the natural lip is enough. This often results in a stark, two-toned effect, especially if the liner is a different shade from the rest of the lip color. A single line lacks dimension and often looks flat or jarring. Effective plumping requires blending, subtle contouring with concealer/highlighter, and potentially color manipulation or gloss to create a cohesive, voluminous look.
Harsh Lines: The Enemy of Natural-Looking Fullness
Visible, sharp lip liner edges are a dead giveaway that you’re wearing makeup, and they detract from any illusion of natural fullness. Lips naturally have soft, blended edges. Any makeup application should mimic this softness. If your liner looks like a crayon drawing, you haven’t blended enough. Always take the time to diffuse those edges until they are seamless.

Achieve Effortless Plumpness: Quick Tips for Every Day
Mastering these techniques doesn’t mean you need an hour-long routine. With practice, you can achieve a naturally fuller pout quickly and efficiently.
The 5-Minute Plump Lip Routine
1. Quick Exfoliation: A swipe of a hydrating balm followed by a gentle buff with your finger or a soft cloth.
2. Strategic Liner: Use a lip liner close to your natural shade. Lightly overline the center of the bottom lip and the Cupid’s bow peaks. Blend the edges *immediately* with your finger.
3. Color Fill (Optional): A quick swipe of a nude lipstick or a tinted balm.
4. Gloss Center: Tap a clear gloss onto the center of your bottom lip and the Cupid’s bow.
5. Concealer Clean-up: Tiny dot of concealer on a fine brush to sharpen the outer edges if needed, blended outwards.
Travel-Friendly Tools for On-the-Go Lip Contouring
Keep your routine simple when you’re out and about. A multi-tasking lip pencil that can line and fill is ideal. A small tube of clear gloss or a hydrating balm can add that finishing touch of plumpness. For touch-ups, blotting papers can remove excess shine before reapplying gloss to the center, maintaining that full look without adding bulk.
Maintaining Your Plumped Look Throughout the Day
Longevity comes down to product choice and technique. Using a lip liner as a base for your lipstick can significantly extend wear. Blotting after applying lipstick can set the color. Reapply gloss to the center of the lips as needed – this is the easiest touch-up and instantly revives the plump effect. If you notice lines blurring, a quick dab of concealer on a fingertip can sharpen edges discreetly.